0-Vibe: Build your first application
This guide walks through building an App Framework recipe from scratch, from an empty repository to a deployed DataRobot application. It covers three progressively richer examples: a simple FastAPI application, an LLM with a notebook, and a full agentic workflow.
Prerequisites
- uv installed
- DataRobot CLI installed
- A DataRobot account and API token
This guide assumes creation of a recipe repository with App Framework components applied into it. A recipe is the repository that contains application code, infrastructure, and component answers files.
Creating a new application from scratch
Every App Framework recipe starts the same way, regardless of what you're building.
Step 1: Create your repository
- Head to the datarobot-oss GitHub org and create a new repository.
- Name it with a
recipe-prefix if you're making a reusable template. - Start from
oss-template-repo. It includes the standard project scaffolding.
Important Git settings:
- Allow merge commits.
- Set merge commits as the default merge strategy.
Step 2: Clone and prepare
Step 3: Install uv
Step 4: Bootstrap your recipe
Run the base component copier and answer the interactive questions:
Copier prompts for the recipe name, the components to include, and other configuration. Answer thoughtfully because those choices shape the structure of the recipe. The foundation is now in place; everything from here is customization.
Tip
Gave a wrong answer? You can change your answers after the fact without starting over. See Working with Copier for how to re-run prompts, override a single answer, or recover from a mistake.
After this step, expect your repository to contain the shared project files that other components build on, including .datarobot/, a Taskfile.yaml, and Pulumi configuration.
Example 1: Simple FastAPI application
Overview
A two-component App Framework application that covers a wide range of common functionality: a FastAPI backend served as a DataRobot Custom Application, with a React frontend included.
Key components
af-component-fastapi-backendaf-component-react(optional)
Implementation
This example assumes completion of Steps 1 through 4 and that the base component is present in the repository.
After bootstrapping with af-component-base, add the FastAPI backend:
Accept the defaults. Then compose the task definitions for the generated project:
Configure your DataRobot credentials:
Develop locally
Start the development server:
Visit http://localhost:8080. Changes are auto-discovered and the server restarts on every file change.
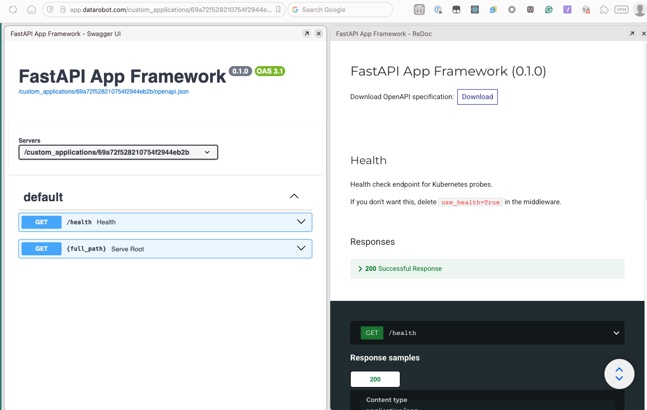
The FastAPI autodocs are available at /docs and /redoc:
Deploy to DataRobot
When you're happy locally, deploy:
If your generated project exposes deployment commands through dr task, use the project-provided deployment command shown by dr task --list. In this guide, the examples use the command produced by the generated Taskfile for each scenario.
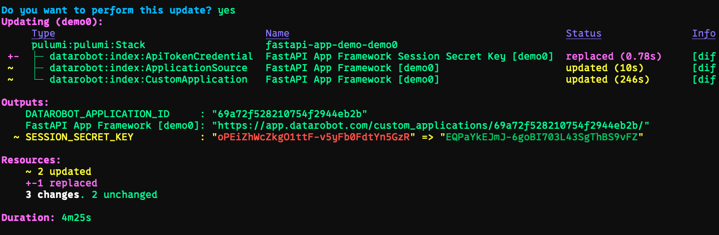
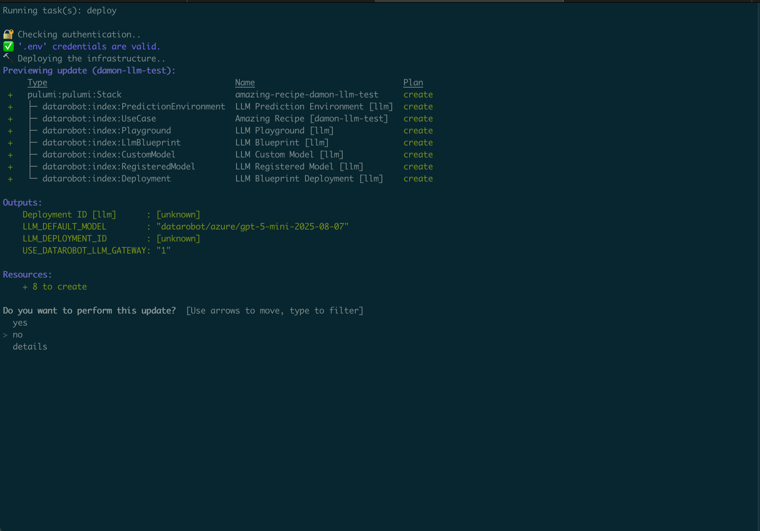
The CLI previews the resources to be created and asks for confirmation:
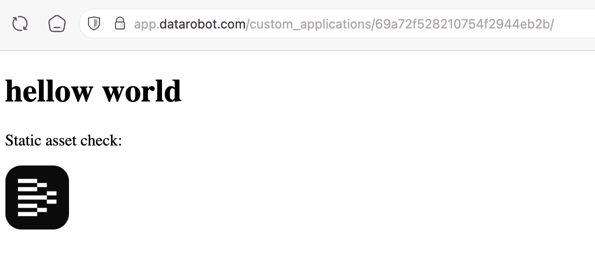
After deployment, your application is live at the URL shown in the output. Open it from your terminal with cmd-click or ctrl-shift-click:
With these steps, the recipe includes unit tests, linters, deployments, fast local iteration, and everything needed for team-driven development through GitHub Actions.
Lifecycle commands:
dr task infra:down   # Tear down to save costs.
dr run deploy        # Bring it back.
dr auth set-url      # Switch to a different DR environment.
Example 2: LLM with notebook
Notebook example overview
For fast iteration on LLM use cases that don't yet need a full agentic workflow, use the LLM component and iterate in a Python notebook — locally or in DataRobot.
Notebook example components
Notebook example implementation
Apply the LLM component to your recipe:
Accept the defaults, then set up your environment:
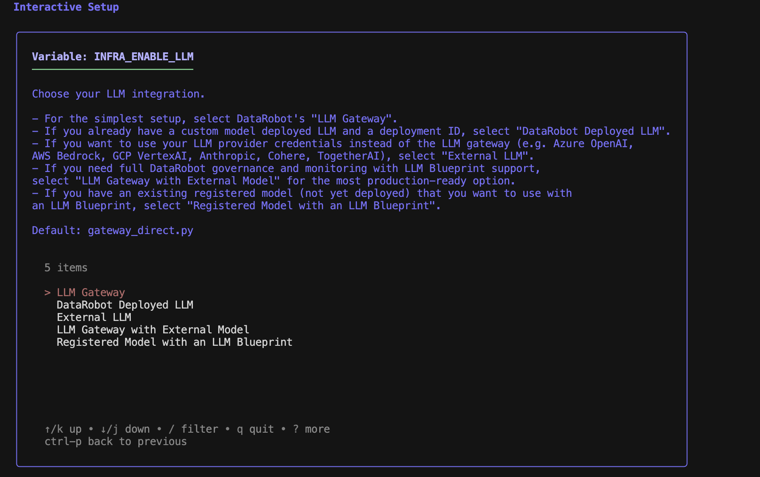
The setup wizard asks for your LLM integration type. For most use cases, select LLM Gateway with External Model — this is the most production-ready option:
Deploy the LLM
Confirm and deploy. When complete, note the deployment ID for notebook development. Retrieve it again at any time with:
Test the LLM in the DataRobot workbench under the use case → LLM Playground.
Notebook development
Create a notebooks directory and start Jupyter:
Codespaces
If running in GitHub Codespaces, skip the uv commands. Run pip install dotenv litellm and use the "Create Notebook" button instead.
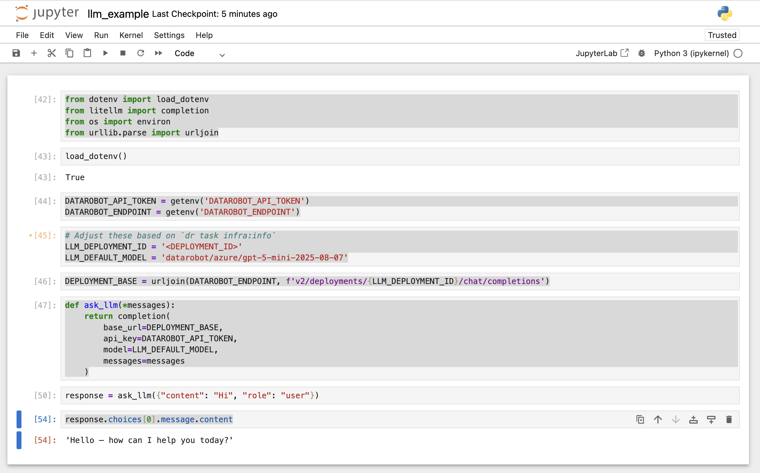
Create a new notebook named llm_example. Add these cells:
from dotenv import load_dotenv
from litellm import completion
from os import getenv
from urllib.parse import urljoin

load_dotenv()
DATAROBOT_API_TOKEN = getenv('DATAROBOT_API_TOKEN')
DATAROBOT_ENDPOINT = getenv('DATAROBOT_ENDPOINT')
# Adjust these based on `dr task infra:info`.
LLM_DEPLOYMENT_ID = 'DEPLOYMENT_ID'
LLM_DEFAULT_MODEL = 'datarobot/azure/gpt-5-mini-2025-08-07'
DEPLOYMENT_BASE = urljoin(DATAROBOT_ENDPOINT, f'v2/deployments/{LLM_DEPLOYMENT_ID}/chat/completions')
def ask_llm(*messages):
    return completion(
        base_url=DEPLOYMENT_BASE,
        api_key=DATAROBOT_API_TOKEN,
        model=LLM_DEFAULT_MODEL,
        messages=messages
    )
Deploy the notebook to DataRobot
Create infra/infra/notebook.py:
from pathlib import Path
from pulumi_datarobot.notebook import Notebook

from . import use_case

PROJECT_ROOT = Path(__file__).resolve().parents[2].absolute()
NOTEBOOK_PATH = PROJECT_ROOT / "notebooks" / "llm_example.ipynb"

notebook = Notebook("llm_example_notebook",
    file_path=str(NOTEBOOK_PATH), use_case_id=use_case.id)
Then run dr task deploy again. The notebook appears in your use case in the DataRobot workbench.
Tip
In the DataRobot-hosted notebook, install dependencies via the terminal: pip install litellm dotenv
Example 3: LLM with agent
Agent example overview
For use cases that need agents, tools, and multi-step workflows, the agent component provides a full agentic framework built on top of the LLM component from Example 2.
Agent example components
Agent example implementation
Step 1 — Apply the base component
Accept the defaults.
Step 2 — Apply the LLM component
Accept the defaults.
Step 3 — Apply the agent component
Use the CLI:
When prompted, choose your agent framework: CrewAI, LangGraph, LlamaIndex, or the YAML-based NeMo Agent Toolkit.
The component creates the following structure:
agent/
├── agent/myagent.py   # Agent workflow
├── cli.py             # Command-line interface
├── dev.py             # Local development server
├── tests/             # Test suite
└── public/            # UI assets
infra/infra/agent.py   # Pulumi configuration
Step 4 — Configure your environment
The wizard asks for:
- Agent port (default: 8842).
- DataRobot execution environment.
- Execution environment version ID.
- Pulumi passphrase.
- DataRobot default use case (can leave blank).
- LLM Gateway configuration.
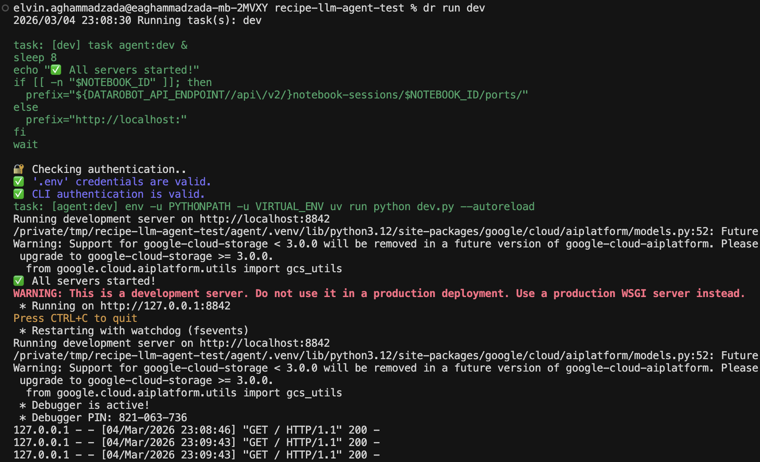
Develop and test locally
Start the server:
In another terminal, run the agent:
# Terminal 2
uv run python cli.py execute --user_prompt "Write a blog post about AI in healthcare" --show_output
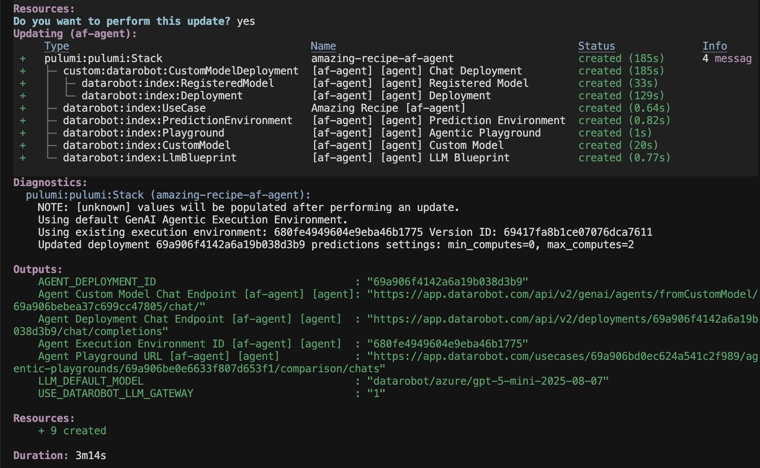
Deploy the agent
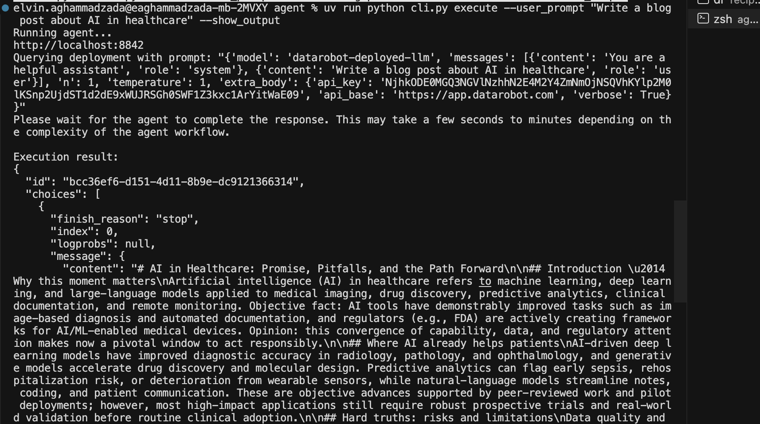
The CLI asks you to name your stack, previews the resources (LLM deployment and agent deployment), and deploys both to DataRobot.
After deployment, find your agent in the DataRobot workbench under your use case. Interact with it through the agent playground or via API calls to the deployment endpoint:
Customize the agent
Edit agent/agent/myagent.py to:
- Change agent roles and goals.
- Modify task descriptions.
- Add more agents to the crew.
- Integrate additional MCP tools.
Discovering available components
- GitHub Search: Search for
af-componentin thedatarobot-communityGitHub org. - Ask in Slack: The #applications channel is a growing group of folks who've built components and love to share!
CI/CD setup
Once your recipe is running, set up CI/CD for automated testing and deployment:
- DataRobot CI/CD docs.
datarobot-agent-skills— CI/CD skill for GitLab and GitHub.